


IrfanPaint
Pixel editing using the selection tool is no longer necessary, as the IrfanPaint plugin was released with version 4.10. To run it, press F12, or select Show Paint Dialog from the Edit menu.
With the IrfanPaint Plugin installed, you can do many basic photo-editing tasks without opening an external editor.
With extended tool tips selected (?), move the mouse pointer over a tool to see tips on its use. The size of text in the tool tips can be changed in Windows, Desktop, Appearance.
The Paint Toolbar is magnetic. Drag it to either side of the IrfanView window and it will snap there. Then it will move with the window if you resize it or load a larger image.
 Select: Limits tools to work within selection
Paintbrush: Left/Right = Fg/Background colour
Eraser: Left/Right = Background/Undo paint
Clone brush: Copy source to target
Colour Replacer: Swap colours
Text Tool: Insert formatted text
Line: Straight line: Shift/Control to constrain
Arrow Arrows: Right click for line endings
Ellipse: Shift = Circle; Control = Centre
Rectangle: Shift = Square; Control = Centre
Fill: Left/right = Foreground/background colour
Colour-picker: Foreground/Background colour
Rotate: Custom rotate to horizon line
Measure: Measure distances and angles
Brush Settings: Line styles and hatch fills
Tool Tips: Brief/Extended tool tips
About: Version number, Credits
Width: Scroll to adjust the brush size
Tolerance: Scroll to adjust tolerance
Fill Checkbox: For ellipses and rectangles
Background colour: Click to change colour
Foreground colour: Click to change colour

Use to return focus to the IrfanView window, to make selections, crop, etc. The IrfanPaint tools, such as paintbrush or flood-fill will have no effect outside of the selected area.

The left mouse button paints with the foreground colour, and the right mouse button paints with the background colour. Hold down the shift key, and scroll with the mouse scroll-wheel to change the brush width or use the width control on the toolbox.

Click and drag with the left mouse button to erase any part of the image, leaving the background colour. Click and drag with the right mouse button to undo any previous painting, leaving the original image. Hold down the shift key, and scroll the mouse scroll-wheel to adjust the width of the eraser.

Hold down the control key and click to define the source; click and drag to define the target and start painting a copy of the source. Hold down the shift key, and scroll with the mouse-wheel to adjust the width of the clone brush.

The colour replacer is used to replace a colour with another one. Click and drag with the left button to replace the background colour with the foreground colour. Click and drag with the right button to replace the foreground colour with the background colour. Hold down the shift key, and scroll the mouse scroll-wheel to adjust the width of the colour replacer.

The Text Tool adds formatted text to the image. The text cursor's cross-hair will be at the text’s baseline. The text will be left, right, or centre aligned on t he insertion point.
When you click the text cursor on an image, the Insert Text dialog opens. Here, you can select text, format individual words or letters with font, size, colour, and text attributes, or align the text left, right, or centre.
Unicode text can be pasted from the clipboard, or typed by using a customised Windows keyboard.
The text can be drawn as an empty path, a filled path, as text or antialiased text. For path text, the text colour icon changes to the brush settings icon, from which you can set the line and fill attributes of the text.
If the text in the dialog is copied to the clipboard all formatting is preserved.
The Hold to preview button will display the formatted text in the image so that you can check that it is not too big, correctly justified, and has a suitable colour contrast, etc., before clicking on OK to insert the text.

Click and drag with the left mouse button to draw a straight line with the foreground colour. Click the right mouse button while dragging to cancel. Hold down the Shift key to constrain the line to 45º angles. Hold down the Control key to draw a line centred on the start point. Hold down the shift key, and scroll with the mouse-wheel to adjust the width of the line. Use the Brush Settings to change the style of the line, or line endings.

The same as the line tool. Right-click the arrow tool to define the start and end arrow styles.

Click and drag to draw an ellipse. Hold down shift to draw a circle. Hold down control to constrain the centre to the start point. Click the right mouse button to cancel drawing.

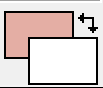
Click and drag to draw a rectangle. Hold down shift to draw a square. Hold down control to constrain the centre to the start point. Click the right mouse button to cancel drawing.

Click with the left mouse button to fill an area with the foreground colour. Click with the right mouse button to fill an area with the background colour. Use the selector tool first to limit the flood fill to the enclosed area.
Note: JPG images rarely have areas of uniform colour. The floodfill tool has an adjustable tolerance setting to fill areas with variations in colour.

Click with the left mouse button to select the foreground colour. Click with the right mouse button to select the background colour. After using the colour picker tool once, focus will immediately return to the previously selected tool.

Click and drag the tool along a straight line or between two points that you want to be on a horizontal or vertical line after rotation. The current background colour will be used to fill the canvas, which is extended to accommodate the rotated image. The background colour used by the custom fine rotation in IrfanView is not affected or used by this tool. It uses the background colour of IrfanPaint.

Click and drag to select the distance to measure. All angles are relative to a horizontal line. To abort the measurement, click the right mouse button. Hold Ctrl while dragging to centre the line on the start point. Hold Shift while dragging to constrain the line to multiples of 45° angles. Right-click on the measure tool button to open the measurement units dialog, in which you can define new units, or edit, delete, and sort the current units.

Open the brush settings dialog to set line and fill styles, and line endings. Results will depend on the line width, and will affect the paintbrush, line, arrow, ellipse, and rectangle tools.
Here you can set the line style, pen width, line ending style, line joints (corner) style, line colour, and line hatching style.
The background tab allows you to set the colour and hatching style for the fill. The secondary hatching colour can be transparent to get a highlighting effect when painting over text with the background colour (right mouse button with the brush tool).
To make it look like there is no pen outline, use the same colour and hatching for the line as you use for the fill.
Empty path text and filled path text will also use these brush settings. Unless text is very large you will probably need to use a line width of only 1 or 2 pixels.
The preview indicates (roughly) what the result will be. Click the preview to invert the foreground and background styles and colours.

Choose between short tool tips and extensive context help for the tool tips shown on mouse over.

Version number of the IrfanPaint Plugin, Credits, and a link to the IrfanPaint website, from where you can download the latest plugins.
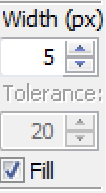
Enter a line width value in pixels, scroll with the buttons, or use the up/down cursor keys to adjust the line width. The line width can also be adjusted by holding shift and scrolling with the mouse wheel, while using the tools.
Higher values Increase the range of colours replaced by the colour replacer and flood fill tools. Reducing it to zero replaces only pixels with the specified colour.
Use by ellipse and rectangle tools. Choose from solid (filled) or outline (unfilled) shapes.
Click to select the background colour
Click to select the foreground colour
Page last updated on 25 December 2024
